
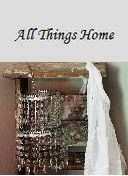
Well, I've been so excited to show you my projects! I just couldn't wait for you to see that I have been using an electric saw and sander and painting with the Annie Sloan Louis Blue Chalk Paint.
MISTAKE #1
Apparently, when a person uses their Pentax SR and sees only black & white through the view finder, the photos turn out to be black and white too! So, all of my photos are black & white. Ugh, Grrrrr, and all of those nasty (Noble says, "Natny"!) things ya just wanna say! My words aren't "swear" words - they are crud, and shoot and stuff like that, which is bad enough. And Noble is picking up on all of those, so I must stop my brain from sending those words to my mouth!
YOUR IMAGINATIONS
OK. So indulge me here and let's play "Pretend". OK? OK. Hoping that you remember how. Pretend that these before photos are in color. And pretend that you can see that the drop leaf table is red with a stained wooden top - which I did 7 years ago, by the way! Who knew I was ahead of the curve?!? I will take new after photos tomorrow, I am just too tired to do it now. Wait! I might be able to photograph the drop leaf table from where I am, which is propped up in bed typing to y'all! LOL! I'll try it and see what happens! =)
MISTAKE #2
This mistake was a big one - but who knew? Here is the drop leaf table. Pretend time! Remember that the bottom part is deep cherry red with a stained top.
 |
| Oh Yikes! Not only is this B&W, which is insulting enough, but my shadow is in the corner. Ugh. Drat... |
The original plan was to put the chalk paint directly over the red. I'm so glad that I didn't. You'll see why in a bit. Instead, I decided to spray paint with Heirloom White and then put the chalk paint over that so that I could distress it a bit and have some white showing through. After using 3.5 cans of paint, there was little bubble on the side of the table. I reached down to rub it away, thinking it was the white, but no! It was the red. The paint was peeling - in huge sheets. Just peeling right off of that table. A good cry came to mind, but instead, I found my handy dandy scraper and began scraping it all off... And that brings us to pretend photo #2.
 |
| Yes sirree, all of big dark blobs are red paint with a nice coat of Heirloom White! |
 |
| More blobs of paint, but she's coming pretty clean. Sanding is next! |
 |
| After sanding, getting ready for a hose bath. I know - but it was the best way. |
This little project was only supposed to take me about 30 minutes and then I was movin' on to something else. Well, this "little" project turned out to be a huge three day project - and it's not over yet! The top is no longer my favorite feature like it was before all of this began. It should have been stripped. My instincts told me, but I ignored myself and the stain went on unevenly. Next week, I'll bite the bullet and strip and re-stain the tops of the leaves.

See how uneven the top is? Shoulda known better. Trying to skip a step never, ever works!


I can take a photo from the bed! Hahahahaha! Here is the drop leaf table. The colors aren't quite true. But I'll do a "real after" tomorrow in the daylight. The table was waxed twice - once with Minwax dark and the second with Minwax natural and buffed between waxes. I love the chalk blue and how the dark wax got into the nicks and crannies of the layers of paint. Can't wait for you to see that. There is no way that I wanted to strip the whole thing, I wanted the unevenness to be there on the bottom part. This table had/has about 5 different colors on it. Amazing! I am learning a lot about re-doing furniture. The more you do, the more you learn.
HOUSE SHOWING TODAY
Jennifer and I worked so hard to prepare for this showing. Cleaned the garage. Trimmed roses on the East side of the house. We cleared the West side yesterday and it was a jungle of tangled, growing, overtaking rose bushes, I tell you! Mowed and "blew" the front yard and sidewalks. Cleaned the inside - you know, all of those things we should do regularly, say we are going to, but don't.
We have three skylights in our home and one is in the master bath. The finish on the wall part was peeling and looked awful. I decided that we'd paint it. Jennifer scraped away all of the peely pieces. I'm so silly. It never dawned on me that I'd have to do something about the missing finish. Out to the garage to find the drywall compound. There is a brush that has been flattened that was used to put the finish on most of our walls - it's a 1980's thing in Texas I guess, since I've never seen it anywhere else. Well, I didn't have the brush - it's in Little Rock is storage! (Isn't everything?!?) So I mixed up the compound, put it in a paper plate, climbed up on the ladder and used my fingers and patted them all over the wall space in the skylight. We put a box fan on top of the ladder flat on it's back to dry the compound and then painted it with ceiling paint! Good as new! Why we hadn't done that a year ago, I don't know.
Don't know if the lookers liked our home. But the house is clean, the ceiling is fixed and tomorrow is a new day!
Y'all be good and let me know what you've been working on! I'm certain that your photos were NOT in black & white! =) Who knew there was an app for that?


.png)


2 comments:
Ahhhhhh I would have gone nuts trying to do all of that with the table ~ I want everything done so quickly that I would have given up I am sure ~
It came out awesome though!!
I was glad to read what you think about chalk paint because I have had a hard time paying that much for it but am dying to try it ~
xoxo
Lori
I take lots of short cuts with my furniture projects, but my Husband likes to do things "right" so I know exactly how you feel, Paula. But it looks great I think. I love the rustic charm, and the added shelf at the bottom is nice, a great table.
Post a Comment